How-to Execute Test Cases in ADO
This guide provides hands-on support for the roles involved in executing test cases and reviewing test results.
Test execution is the process of running test cases based on test scenarios created for software applications or hardware to ensure that they meet all pre-defined functional and non-functional requirements and specifications. The tests are categorized and executed according to a test plan.
Note: This guide is applicable for both manual and automated execution of test cases.
Intended for
Product managers, product owners, scrum masters, software engineers, hardware engineers, test engineers, and quality engineers.
Activities
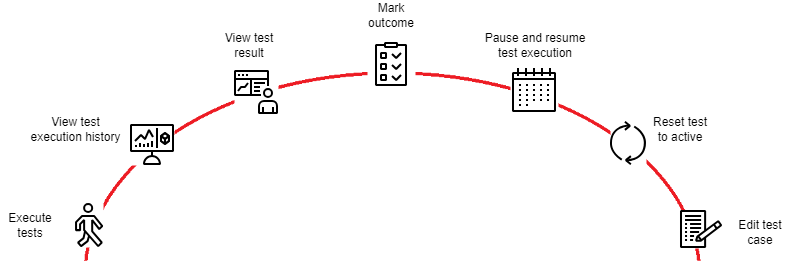
Execute tests
ADO offers three ways to execute tests:
- Through a web application.
- Through a desktop application.
- Through supported clients.
Execution through a web application
Perform the following procedure to execute the test steps:
-
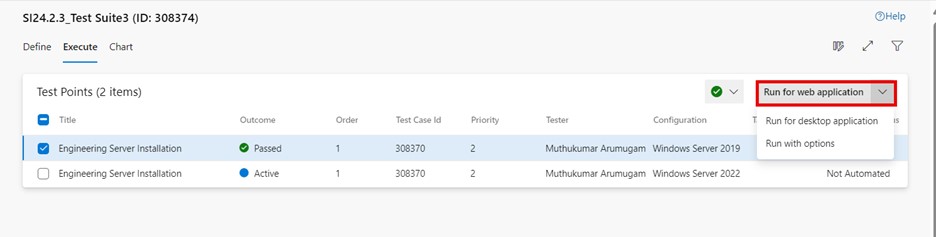
Go to the "Execute" tab in a test suite.
-
Select the desired test point.
-
Click on "More options" or right-click to open the context menu and select "Run > Run for web application". The "Runner – Test Plans" dialog box is displayed to start the test step execution.
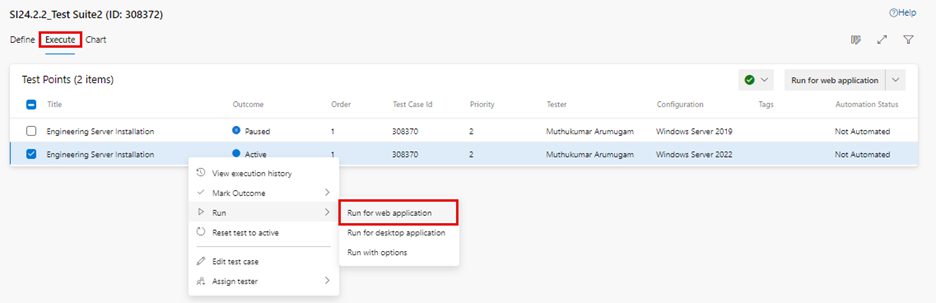
The "Run for web application" menu can also be accessed from the top right drop-down list:
-
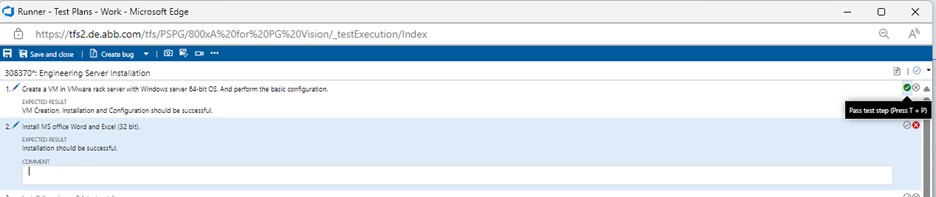
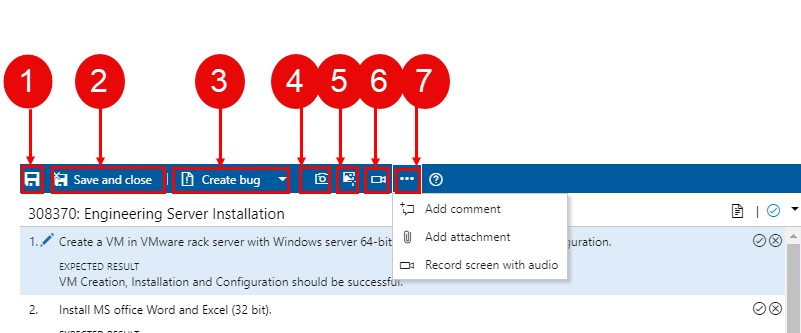
If the individual test step meets the expected results, then click on the "Pass test step" icon (or press T + P) for the corresponding test step.
-
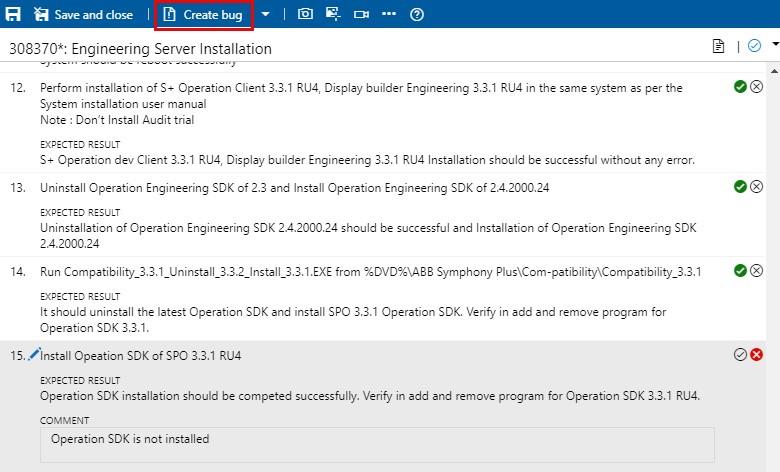
If the individual test step does not meet the expected results, then click on the "Fail test step" icon (or press T + F).
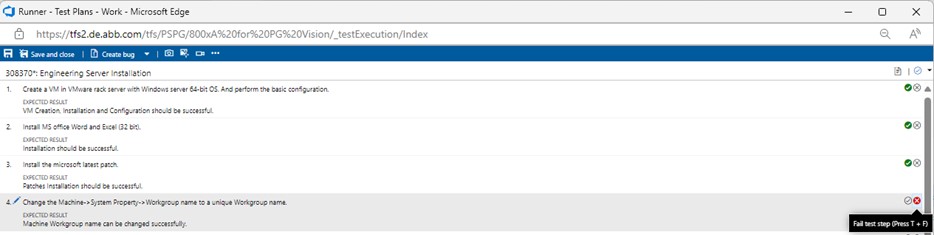
Enter a comment on why it failed.
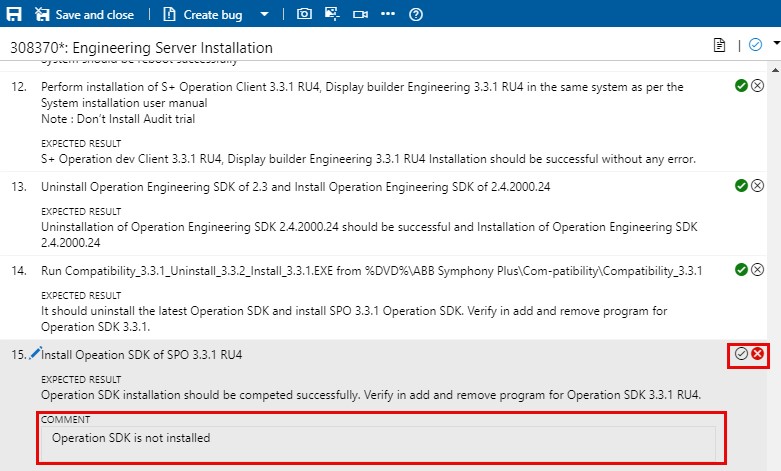
Create a bug (or update an existing bug, see below).
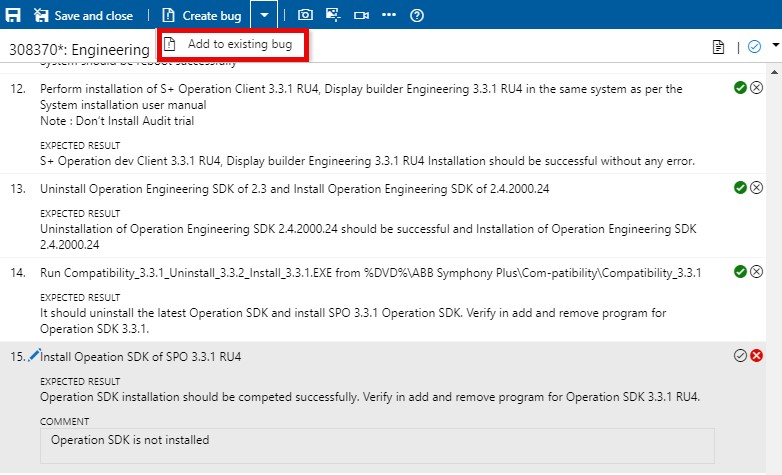
Instead of creating a bug, you can update an existing bug with information about this step. Select "Add to existing bug" from the "Create bug" drop-down menu.
-
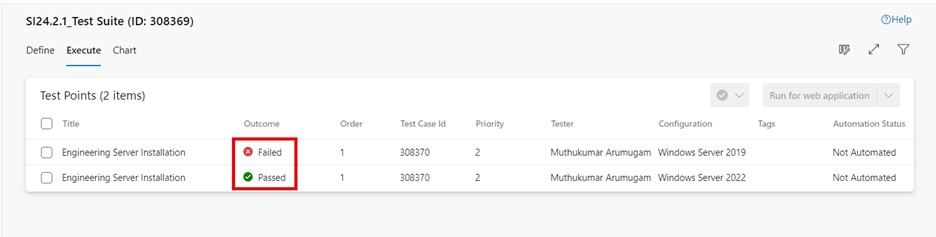
If all individual test steps are passed, then the respective test point is passed, and the outcome status is displayed as passed.
-
If one or more test steps fail, the respective test point is failed, and the outcome status is displayed as failed.
Note: There is no option available for "passed with remarks." Test points should be passed or failed based on meeting the expected results. Add the screenshot reference in the test step for all important validation steps if required.
Execution through desktop application
Perform the following procedure to execute the test steps:
-
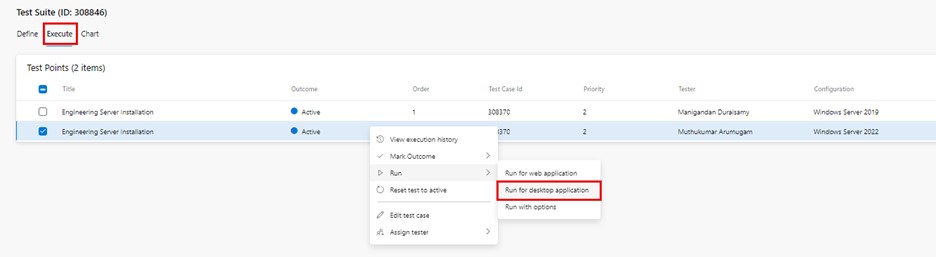
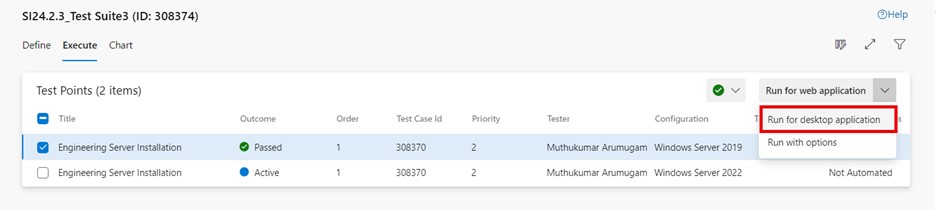
Go to the "Execute" tab in a test suite and select the desired test point.
-
Click on "More options" or right-click to open the context menu and select "Run > Run for desktop application". The "Run for desktop application" dialog box is displayed to download the test runner application.
The "Run for desktop application" menu can also be accessed from the top right drop-down list:
-
Download and install the test runner application.
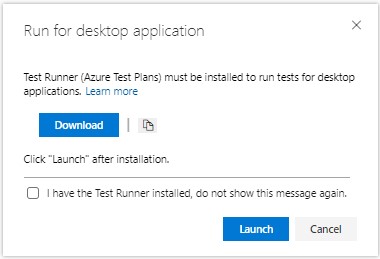
-
Click on "Launch" in the "Run for desktop application" dialog box.
-
If the individual test step meets the expected results, then click on the "Pass test step" icon (or press T + P) for the corresponding test step.
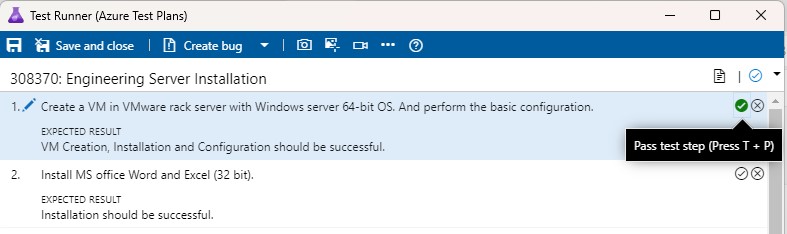
-
If the individual test step does not meet the expected results, then click on the "Fail test step" icon (or Press T + F).
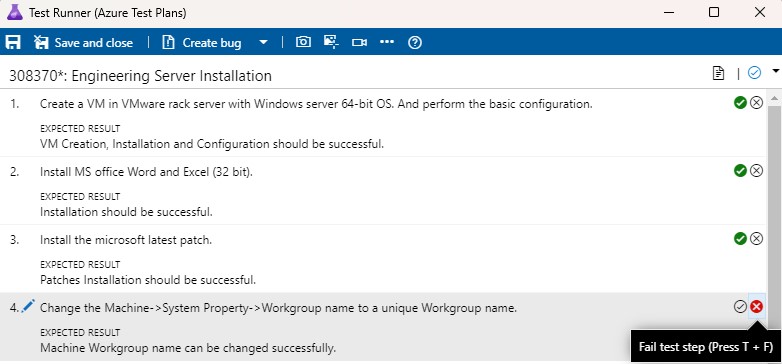
-
If all individual test steps are passed, then the respective test point is passed, and the outcome status is displayed as passed.
-
If one or more test steps fail, the respective test point is failed, and the outcome status is displayed as failed.
Note: There is no option available for "passed with remarks". Test points should be passed or failed based on meeting the expected results.

Execution through supported clients
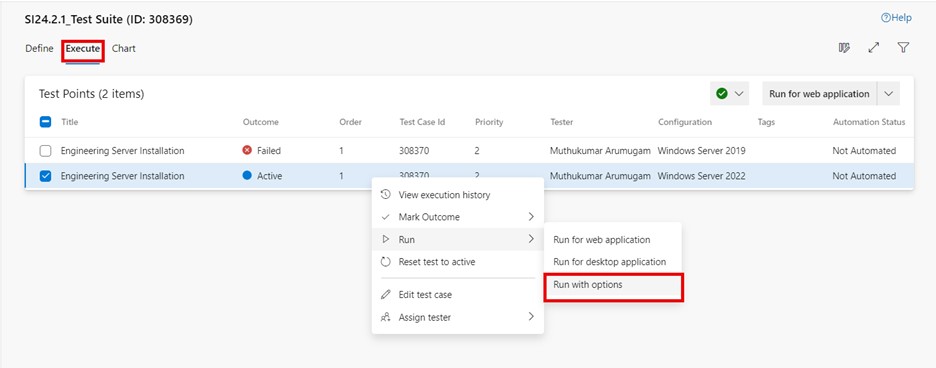
Perform the following procedure to execute the test steps:
-
Go to the execute tab in a test suite and select the desired test point.
-
Click on "More options" or right-click to open the context menu and select "Run > Run with options". The "Run with options" dialog box is displayed to select the test type and runner.
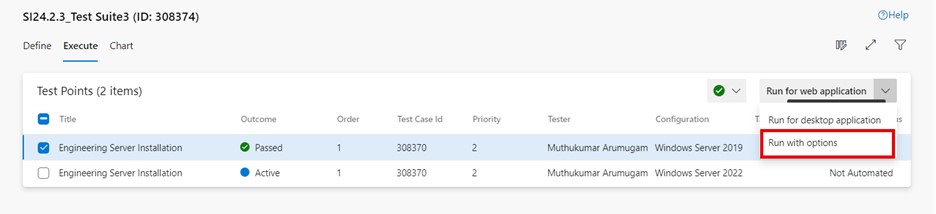
The "Run for desktop application" menu can also be accessed from the top right drop-down list.
-
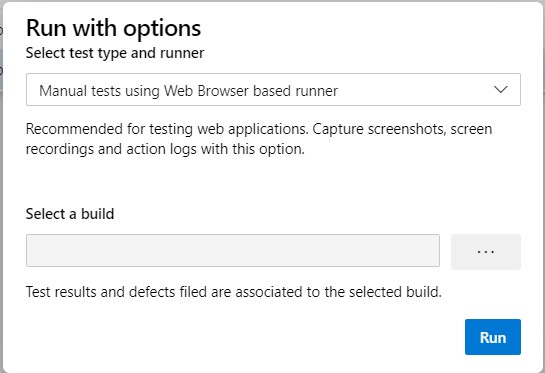
Select test type and test runner and select a build.
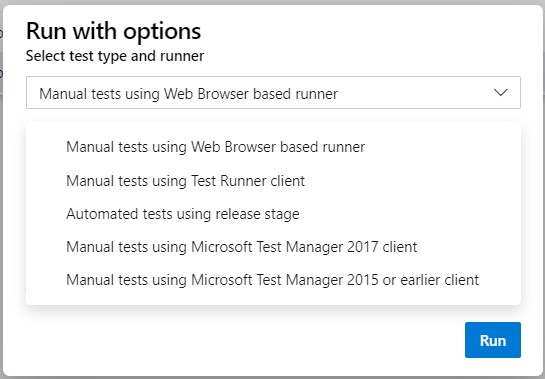
The following options are available:
-
Manual tests using web browser-based runner. Select a specific build to test, as described in run tests for a build. Select "Find builds" to open the "Find builds" dialog box and search for a build to test against.
-
Manual tests using test runner client. Run manual tests for desktop applications by using the test runner client. If necessary, install the test runner desktop client.
-
Automated tests using the release stage. Run tests using a release stage. Select a build, select a release pipeline, and stage to consume the build's artifacts. For more information, see Microsoft's information on Run automated tests from test plans.
-
Manual tests using Microsoft Test Manager 2017 client. Collects data from a local machine. Select a build, and select one or more data collectors: action log, event log, screen and voice recorder, and system information.
-
Manual tests using Microsoft Test Manager 2015 or earlier client.
-
Save.
-
Save and close.
-
Create a bug and add an existing bug.
-
Capture screenshot.
-
Capture user actions as an image action log.
-
Record screen.
-
Add information to test results.
-
-
View test execution history
To view the recent test results for a specific test case:
-
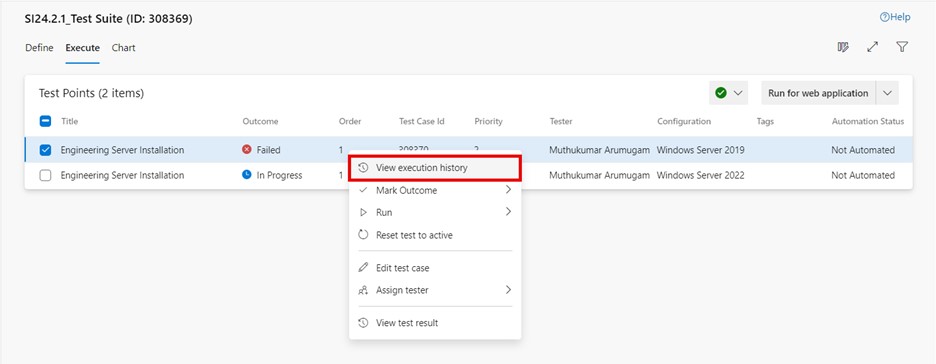
Go to the "Execute" tab in a test suite and select the desired test case.
-
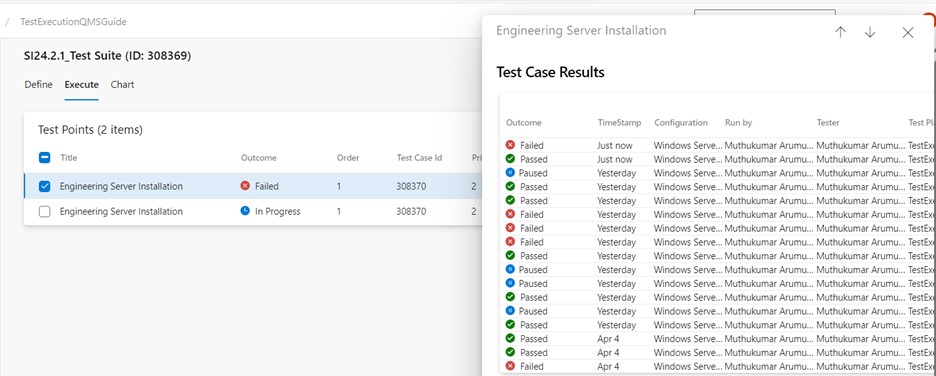
Click on "More options" or right-click to open the context menu and select "View execution history." The "Test case results" dialog box will then display the execution history.
-
Double-click on one of the test case outcomes and view the test result.
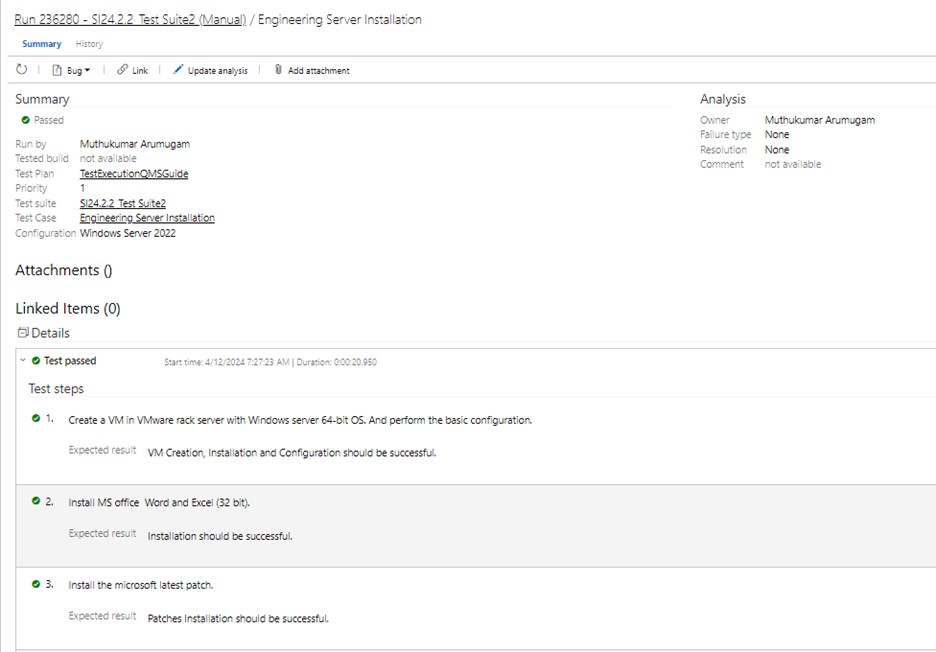
View test result
To view the test result for a specific test point:
-
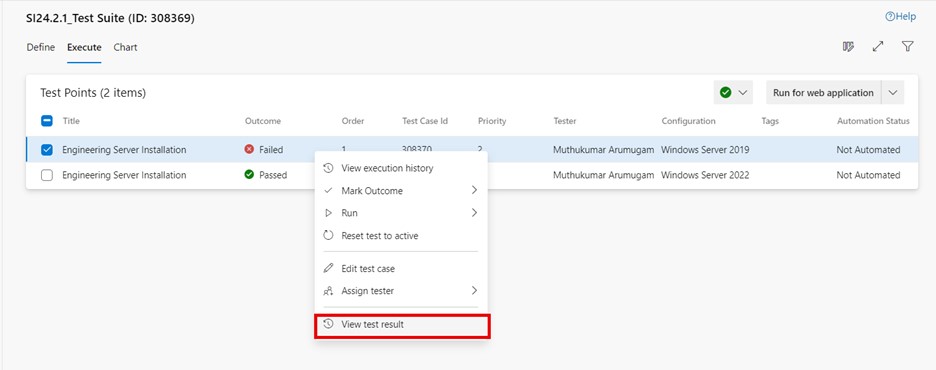
Go to the "Execute" tab in a test suite and select the desired test point.
-
Click on "More options" or right-click to open the context menu and select "View test result." The "Test result summary" window will then display the test result.
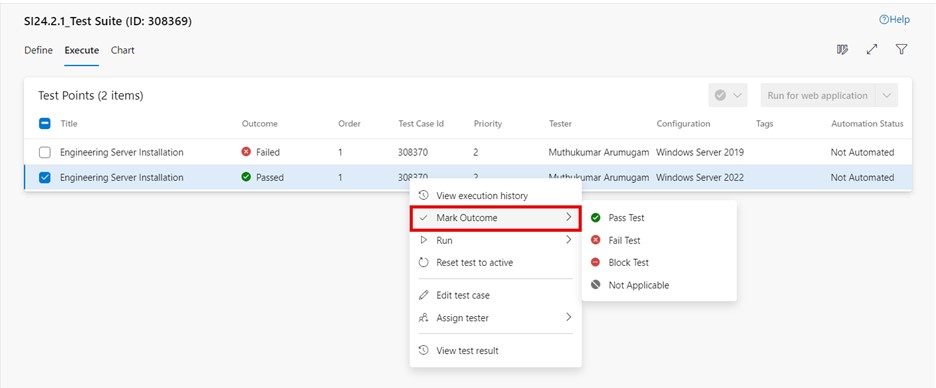
Mark outcome
To mark the outcome for a specific test point:
-
Go to the "Execute" tab in a test suite and select the desired test point.
-
Click on "More options" or right click to open the context menu and select "Mark outcome".
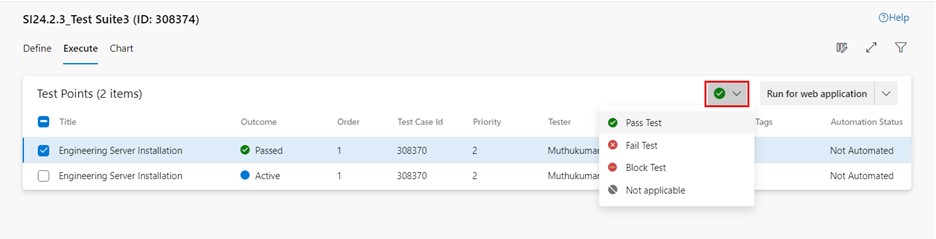
The "Mark outcome" option is also available in a drop-down box.
In ADO, when executing test points, their outcomes can be marked using the following terms:
- Pass test. Indicates that the test point passed successfully.
- Fail test. Indicates that the test point failed to meet the expected results.
- Block test. Indicates that the test point execution was blocked due to external factors (e.g., environment issues, dependencies).
- Not applicable. Indicates that the test case is not relevant to the current scenario.
Note: There is no option for "passed with remarks". Test points should be passed or failed based on meeting the expected results.
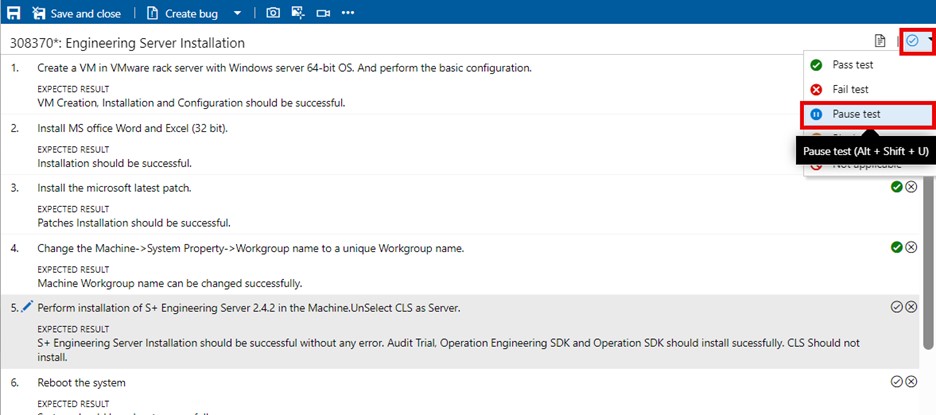
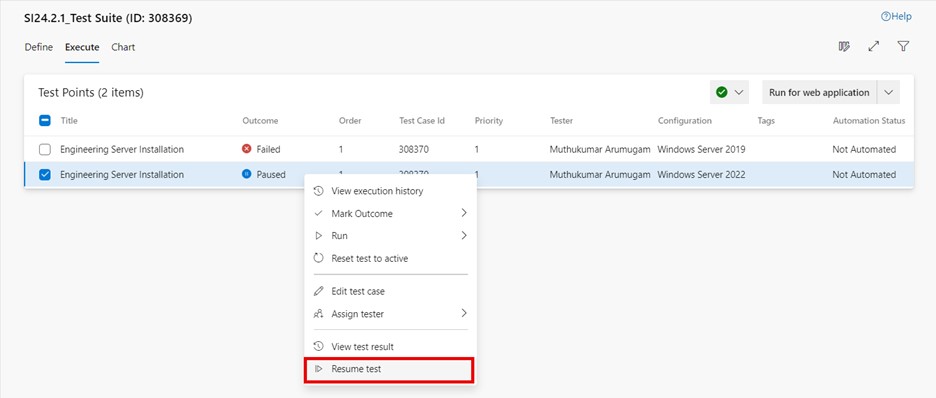
Pause and resume test execution
Perform the following procedure to pause and resume a test execution (once a test step is running):
-
In the mark test result drop-down menu, click on the "Pause test" option and then on "Save & close."
-
The test point is now in the "Paused" state. To resume testing, select the test point and click on "Resume test".
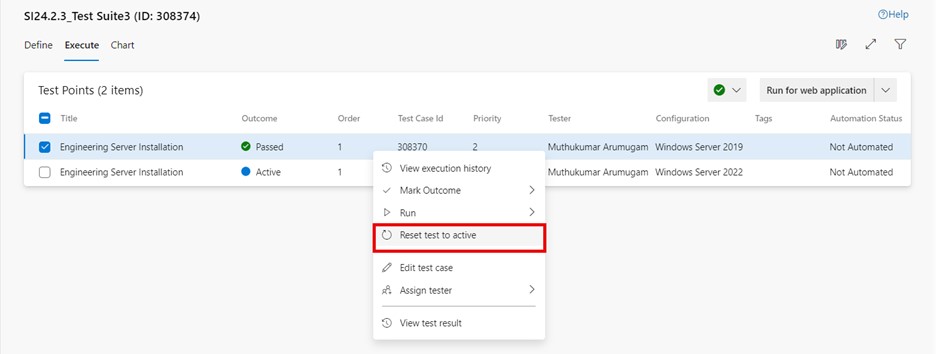
Reset test to active
To reset the test for a specific test point:
-
Go to the "Execute" tab in a test suite and select the desired test point.
-
Click on "More options" or right-click to open the context menu and select "Reset test to active". The test point outcome is changed from the previous outcome to "Active-.
Edit test case
During test execution, there can still be a need to update individual test cases, e.g., because of changes in software or its behavior. To edit a test case:
-
Go to the "Execute" tab in a test suite and select the desired test point.
-
Click on "More options" or right click to open the context menu and select "Edit test case".
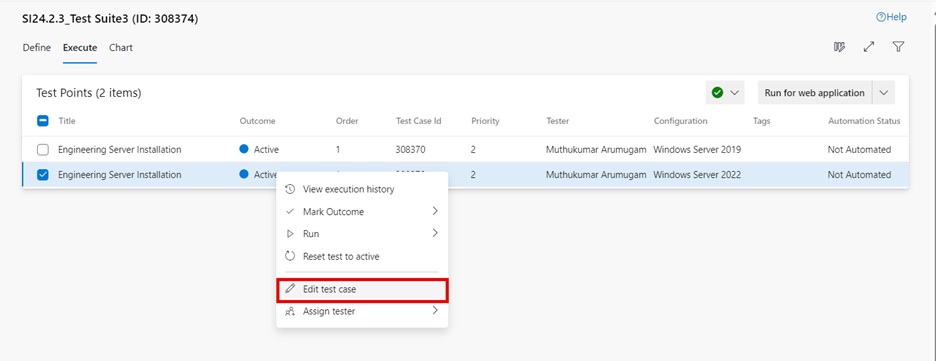
-
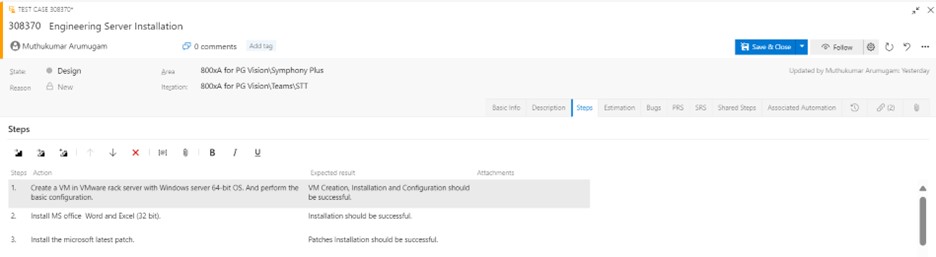
Edit the test case information and click "Save & close".
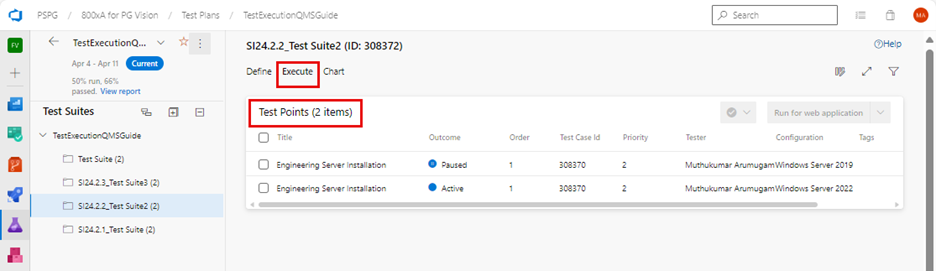
Details
Test points
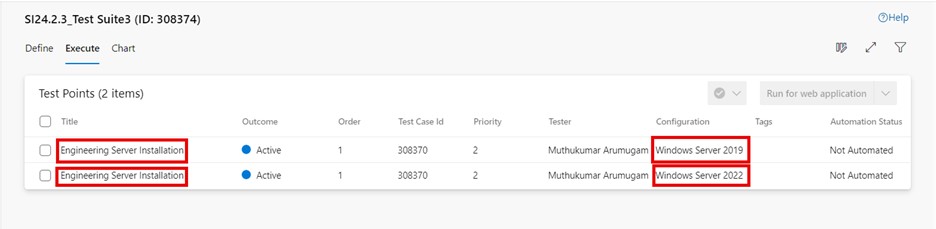
When you add a test case to a test suite, then the test point is generated. A test point is a unique combination of test case, test suite, configuration, and tester. If you have a test case named “Engineering Server Installation” and assigned only one configuration, “Windows Server 2019 Operating system,” to it, then only one test point is generated.
If you have a test case named “Engineering Server Installation” and you have added two configurations for the “Windows Server 2019” and “Windows Server 2022” Operating systems, then two test points are generated. You can execute each of these test points individually.
: test points can be executed, not the individual test cases. A test point represents a unique combination of test case, test suite, configuration, and tester.
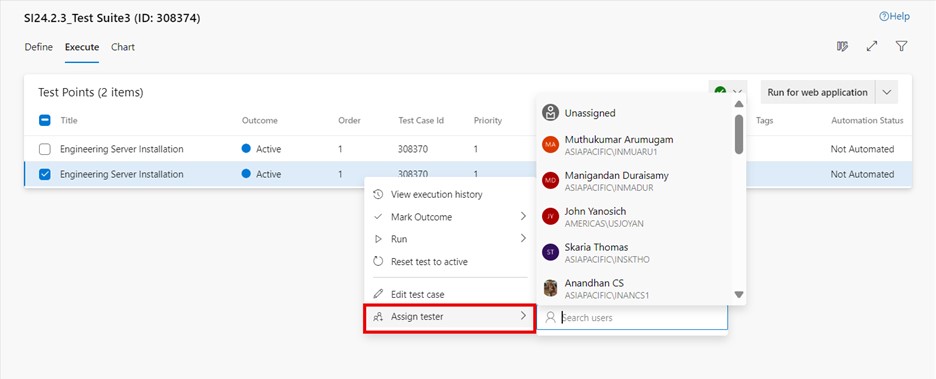
Assign tester to test point
To assign the tester to a specific test point:
-
Go to the execute tab in a test suite and select the desired test point.
-
Click on more options or right-click to open the context menu and select assign tester.
-
Tester information is updated in respective test points once the tester is assigned.